


Ways to Improve Seed Germination in a 10 Foot Garden Dome
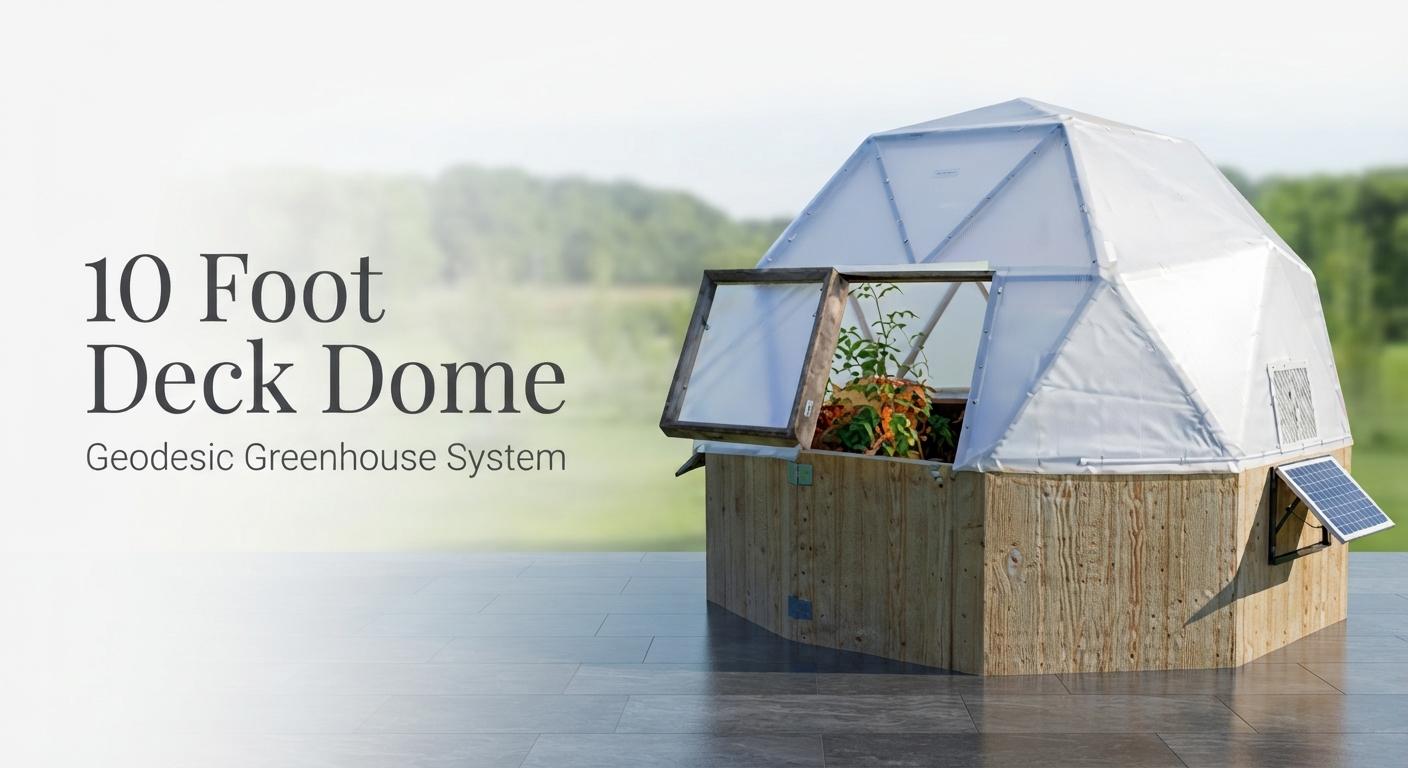
Successful seed starting begins with the right balance of moisture, temperature, oxygen, and light. In a 10 Foot Garden Dome, a small, organized seed-starting area can help gardeners monitor trays closely, protect newly sown seeds, and make efficient use of limited growing space. Choosing suitable growing media and checking conditions regularly can improve germination consistency and help young plants establish strong roots.
1. Choose Fresh Seeds and Suitable Varieties
Seed quality is one of the first factors to consider when preparing for germination. Older seeds may have lower viability, although storage conditions and the type of plant also influence how long seeds remain usable.
Check seed packets for the variety name, packing date, recommended sowing season, and germination instructions. Select vegetables, herbs, or flowers suited to your local climate and the conditions you can maintain inside the dome.
If you are unsure whether stored seeds are still viable, test a small sample using a suitable germination method before dedicating valuable growing space to them. Label each variety clearly so you can track its performance.
2. Use a Fine, Well-Draining Seed-Starting Mix
Seeds need consistent contact with moisture, but they also require oxygen to begin growing. Heavy or compacted soil can retain excessive water and restrict air movement around the seed.
Use a clean seed-starting mix designed to retain moisture while allowing excess water to drain. Fill trays or small pots loosely rather than packing the material tightly.
Avoid using dense garden soil in seed trays, especially when it drains poorly or may contain harmful organisms. Clean containers thoroughly before reuse, and make sure drainage holes remain open.
A suitable growing medium creates a more consistent environment for seeds and helps reduce problems associated with waterlogged conditions.
3. Maintain Consistent Moisture Without Overwatering
Water activates the germination process, so seeds should not be allowed to dry out after sowing. However, constantly saturated growing media can deprive seeds of oxygen and increase the risk of decay.
Moisten the seed-starting mix before planting, then water gently using a fine spray or another method that will not wash seeds out of position. Check the surface and the moisture deeper in the tray regularly.
Small seed cells can dry quickly, particularly during warm or windy weather. At the same time, avoid watering automatically if the mix is already sufficiently moist.
The aim is to maintain even moisture without creating soggy conditions. Adjust watering according to the seed variety, container size, and temperature inside the dome.
4. Monitor Temperature at Seed Level
Temperature affects both the speed and success of germination. Different seeds have different preferred temperature ranges, so one setting may not suit every variety.
Use the instructions on the seed packet to determine the appropriate range. A thermometer placed near the seed trays can provide more useful information than relying only on the general air temperature inside the dome.
Be especially careful on sunny days. A small enclosed growing space can heat up quickly, and direct sunlight may make covered trays excessively warm. Provide ventilation or move trays to a more suitable location when temperatures exceed the recommended range.
For warmth-loving seeds, a thermostatically controlled seedling heat mat may help maintain more consistent conditions when appropriate. Always follow the equipment instructions and monitor the growing medium to avoid overheating.
5. Follow the Correct Sowing Depth
Planting seeds too deeply can delay emergence or prevent seedlings from reaching the surface. Seeds placed too close to the surface may dry out before germination begins.
Check the recommended sowing depth for each variety. A general guideline is to plant many seeds at a depth of approximately twice their diameter, although some seeds need light to germinate and should remain on or very near the surface.
Use a dibber or your fingertip to make consistent holes, then cover the seeds gently when required. Avoid pressing the growing medium too firmly around them.
If you are starting several varieties in the same tray, label each section and follow its specific sowing instructions.
6. Provide Suitable Light After Germination
Light requirements vary between seed varieties during germination, but newly emerged seedlings generally need adequate light to develop strong stems and healthy leaves.
Position seed trays where they receive suitable light without excessive heat. If natural light is insufficient, consider an appropriate grow light positioned according to the manufacturer's recommendations.
Rotate trays when necessary to promote more even light exposure. Watch for elongated, weak stems, which can indicate insufficient light, and avoid placing seedlings where intense sunlight causes wilting or scorching.
Once seedlings emerge, gradually adjust their growing conditions to support continued development. Remove humidity covers as sprouts appear so the young plants receive better airflow and are less likely to remain excessively damp.
7. Keep Seed Trays Clean and Well Spaced
Clean growing equipment helps reduce the risk of damping-off and other problems that can damage newly emerged seedlings. Wash reusable trays and pots before planting, and use clean growing media.
Arrange trays so you can inspect them, water them, and remove covers without disturbing neighboring seedlings. Avoid overcrowding the seed-starting area simply because the dome has limited space.
Once seedlings emerge, maintain enough space for air movement and light. Remove weak or overcrowded seedlings when appropriate, following the needs of the crop.
A small, clearly organized propagation area makes it easier to track germination and identify problems before they affect an entire tray.
8. Track Germination and Adjust Your Routine
Keep a simple record of the date each variety was sown, the number of seeds planted, and when the first seedlings appeared. Compare the results with the expected germination period printed on the seed packet.
If germination is poor, review the growing conditions before planting another batch. Check whether the seeds were fresh, whether the medium stayed moist, and whether temperatures remained within the suitable range.
Also consider sowing depth, drainage, and the variety's light requirements. Make one or two adjustments at a time so you can identify which changes improve results.
Over several planting cycles, these records can help you establish a repeatable seed-starting routine for your 10 Foot Garden Dome.
Gardeners planning a compact growing setup can review the options available from Dome Greenhouses when considering how to organize seed starting and ongoing plant care.
Final Thoughts
Improving seed germination in a 10 Foot Garden Dome starts with suitable seeds, clean growing media, consistent moisture, and careful temperature management. Correct sowing depth, adequate light after emergence, and regular monitoring also help young plants establish successfully. By recording results and adjusting conditions for each variety, gardeners can make better use of limited space and develop a reliable seed-starting routine.
Frequently Asked Questions
1. How long does seed germination take in a garden dome?
Germination time varies by plant variety and growing conditions. Some seeds sprout within a few days, while others may need several weeks. Follow the seed packet's expected germination range.
2. Should seed trays be covered during germination?
A suitable humidity cover can help keep growing media moist. Remove or open the cover as seedlings emerge to improve airflow and prevent excessive moisture buildup.
3. Can a small garden dome become too hot for seeds?
Yes. Enclosed spaces can heat up rapidly in direct sunlight. Monitor temperatures near the trays and provide ventilation or relocate trays when conditions exceed the seeds' recommended range.
4. Why are my seeds not germinating?
Possible causes include old seeds, unsuitable temperatures, inconsistent moisture, excessive watering, poor drainage, incorrect sowing depth, or specific light requirements. Check these factors before trying again.
5. What is the best growing medium for starting seeds?
A clean, fine-textured seed-starting mix that retains moisture while draining well is generally suitable. Avoid compacted media that restricts oxygen around developing seeds.

 English
 Arabic
 French
 Spanish
 Deutsch
 Turkish
 Dutch
 Italiano
 Russian
 Romaian
 Portuguese (Brazil)
 Greek